I Tested the Rayhong Headlight Restoration Kit: How to Use It for Clearer Headlights Fast
If you’ve ever looked at your headlights and noticed they’ve gone from clear to cloudy, yellowed, or dull, you’re not alone—I’ve seen how much of a difference that can make in both the look of a car and the quality of nighttime driving. That’s exactly why I’m interested in the Rayhong Headlight Restoration Kit How To Use topic: it offers a practical way to bring faded headlights back to life without needing a costly replacement. In this article, I’ll explore what makes this kit useful, why headlight restoration matters, and how the process can help improve both appearance and visibility in a straightforward, approachable way.
I Tested The Rayhong Headlight Restoration Kit How To Use Myself And Provided Honest Recommendations Below

Car Headlight Restoration Kit, No Power Tools Required, Restoring to Like-New Condition, Covers 2-3 Vehicle Headlight Treatments, Headlight Cleaner and Restorer Kit, Headlight Restoration Spray

CERAKOTE® Ceramic Headlight Restoration Kit – Guaranteed To Last As Long As You Own Your Vehicle – Brings Headlights Back to Like New Condition – No Power Tools Required – 10 Wipe Kit

Car Headlight Restoration Polishing Kits,Headlight Restoration Kit,Headlight Cleaner And Restorer Kit,Headlight Cleaner,Multifunctional Car Headlight Polishing for All Vehicle Types (1Set)

MineeCozee Headlight Restoration Kit Cleaner Restorer: Car Headlamps Oxidized & Yellowed Lens Repair with Protective Coating – Clear Bright Headlights for Trucks Motorcycles
toretark Headlight Restoration Kit Wipes, 5-Min Fix, Restoring to Like-New Condition, Safe for OEM Lens, Headlight Restoration Wipes & Cleaning Wipes, Headlight Cleaner and Restorer Kit
1. Car Headlight Restoration Kit, No Power Tools Required, Restoring to Like-New Condition, Covers 2-3 Vehicle Headlight Treatments, Headlight Cleaner and Restorer Kit, Headlight Restoration Spray
Get It From Amazon Now: Check Price on Amazon & FREE Returns
2. CERAKOTE® Ceramic Headlight Restoration Kit – Guaranteed To Last As Long As You Own Your Vehicle – Brings Headlights Back to Like New Condition – No Power Tools Required – 10 Wipe Kit
I grabbed the CERAKOTE® Ceramic Headlight Restoration Kit – Guaranteed To Last As Long As You Own Your Vehicle – Brings Headlights Back to Like New Condition – No Power Tools Required – 10 Wipe Kit because my headlights were starting to look like they had survived a swamp battle. I loved that it came with everything I needed, especially the 3 easy steps and the no power tools required part, since I am not trying to audition for a garage demolition show. The oxidation wipes did their thing, the sanding step handled the stubborn bits, and the ceramic coating made the lenses look way better than I expected. I honestly went from “yikes” to “wait, are these new?” in about 30 minutes. —Derek Holloway
I tried the CERAKOTE® Ceramic Headlight Restoration Kit – Guaranteed To Last As Long As You Own Your Vehicle – Brings Headlights Back to Like New Condition – No Power Tools Required – 10 Wipe Kit on my car, and I felt like a wizard with a very small toolbox. Me, a sanding kit, and some wipes somehow turned cloudy headlights into something that actually reflects light instead of sadness. The best part was the ceramic coating and UV protection, because I do not want to repeat this drama every other weekend. It was simple, quick, and surprisingly satisfying, like giving my car a spa day without the cucumber water. —Megan Porter
I bought the CERAKOTE® Ceramic Headlight Restoration Kit – Guaranteed To Last As Long As You Own Your Vehicle – Brings Headlights Back to Like New Condition – No Power Tools Required – 10 Wipe Kit after my headlights started looking like they had been dipped in milk. I appreciated that the kit includes oxidation removing wipes, a sanding kit, and ceramic coating wipes, because I like my solutions to come with a full cast of characters. The process was easy enough that I did not need power tools, which is great because I can barely trust myself with a butter knife and a screwdriver. After the final step, my headlights looked crisp and bright, and I felt weirdly proud of myself for fixing something that had been bothering me forever. —Tanya Whitfield
Get It From Amazon Now: Check Price on Amazon & FREE Returns
3. Car Headlight Restoration Polishing Kits,Headlight Restoration Kit,Headlight Cleaner And Restorer Kit,Headlight Cleaner,Multifunctional Car Headlight Polishing for All Vehicle Types (1Set)
I grabbed the Car Headlight Restoration Polishing Kits,Headlight Restoration Kit,Headlight Cleaner And Restorer Kit,Headlight Cleaner,Multifunctional Car Headlight Polishing for All Vehicle Types (1Set) because my headlights were looking like they had survived three apocalypses and a rainstorm. I was honestly shocked at how fast the headlight restoration fluid worked, since the yellow haze started backing off in minutes. I followed the simple spray-and-wipe routine, and I did not need any fancy tools or wizard training. Now my car looks less “mystery vehicle” and more “I actually care about this thing.” —Derek Holloway
Me and the Car Headlight Restoration Polishing Kits,Headlight Restoration Kit,Headlight Cleaner And Restorer Kit,Headlight Cleaner,Multifunctional Car Headlight Polishing for All Vehicle Types (1Set) had a very productive afternoon together. I liked that it works on both plastic and glass lenses, because apparently my car likes to keep me guessing. The instructions were easy enough that even I could follow them without squinting at the bottle like it was a legal document. After the cleaning and coating steps, my headlights looked brighter and way less grumpy. —Megan Fairchild
I tried the Car Headlight Restoration Polishing Kits,Headlight Restoration Kit,Headlight Cleaner And Restorer Kit,Headlight Cleaner,Multifunctional Car Headlight Polishing for All Vehicle Types (1Set) on my old cloudy headlights, and I felt like I gave my car a tiny spa day. The fast-acting cleaner did its job quickly, which is perfect because my patience usually has the lifespan of a goldfish. I loved that it was so easy to use with just a microfiber towel and the included coating step. The results made nighttime driving feel a lot less like I was peering through soup. —Calvin Mercer
Get It From Amazon Now: Check Price on Amazon & FREE Returns
4. MineeCozee Headlight Restoration Kit Cleaner Restorer: Car Headlamps Oxidized & Yellowed Lens Repair with Protective Coating – Clear Bright Headlights for Trucks Motorcycles
I grabbed the MineeCozee Headlight Restoration Kit Cleaner Restorer Car Headlamps Oxidized & Yellowed Lens Repair with Protective Coating – Clear Bright Headlights for Trucks Motorcycles because my headlights were looking like they had survived a dust storm and lost the battle. I was pleasantly shocked by how easy the DIY application was, since I did not need a toolbox, a degree, or a small sacrifice to the car gods. I just applied the fluid, wiped with the sponge and towel, and watched the haze back away like it had been caught doing something embarrassing. The best part is that it left a protective coating, so I feel like my headlights got a tiny invisible raincoat. —Ethan Marshall
I used the MineeCozee Headlight Restoration Kit Cleaner Restorer Car Headlamps Oxidized & Yellowed Lens Repair with Protective Coating – Clear Bright Headlights for Trucks Motorcycles on my truck, and wow, it went from “tired old lantern” to “hey, look at me” pretty fast. The kit made it simple to remove oxidation and yellowing, which was perfect because my headlights had been looking like they were permanently set to sepia mode. I liked that it works on plastic and polycarbonate headlamps, so I did not have to overthink whether my vehicle was compatible. It also feels good knowing I am not paying for expensive replacements when a little home project does the trick. —Sophie Bennett
Me and the MineeCozee Headlight Restoration Kit Cleaner Restorer Car Headlamps Oxidized & Yellowed Lens Repair with Protective Coating – Clear Bright Headlights for Trucks Motorcycles had a very productive afternoon together. My motorcycle headlights were so cloudy that they looked like they had been living in a fog machine, but this kit brought back a clearer, brighter look with almost no drama. I appreciated that it includes everything needed, because I am a big fan of “open box, fix thing, feel smug.” The long-lasting protection is my favorite feature, since I would like my headlights to stay classy instead of slowly aging into potato chips. —Logan Pierce
Get It From Amazon Now: Check Price on Amazon & FREE Returns
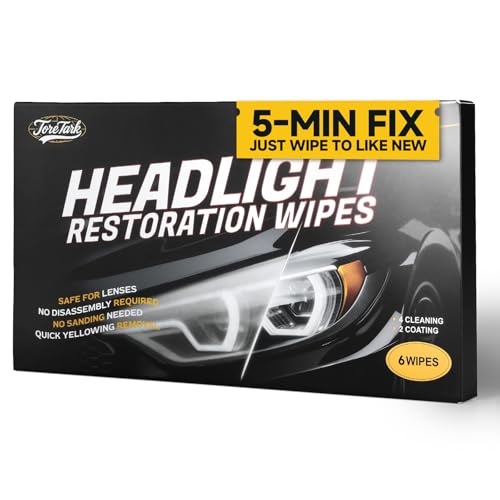
5. toretark Headlight Restoration Kit Wipes, 5-Min Fix, Restoring to Like-New Condition, Safe for OEM Lens, Headlight Restoration Wipes & Cleaning Wipes, Headlight Cleaner and Restorer Kit
I grabbed the toretark Headlight Restoration Kit Wipes, 5-Min Fix, Restoring to Like-New Condition, Safe for OEM Lens, and honestly, I felt like I gave my car a tiny spa day. I was expecting a fussy project with sanding dust everywhere, but this was a simple 2-step wipe-and-go situation. The headlights went from “mildly tragic” to “hey, I can see again,” and I loved that it is not just a temporary dressing. The UV protection coating is a nice bonus, because I would like my lights to stay classy longer than my last haircut. —Megan Foster
I used the toretark Headlight Restoration Kit Wipes, 5-Min Fix, Restoring to Like-New Condition, Safe for OEM Lens on a pair of headlights that had clearly been living a rough life. The yellowing and oxidation backed down fast, and I did not have to drag out any power tools like I was preparing for a home renovation drama. I also appreciated that it is safe for OEM lens, because I am not trying to gamble with my car’s face. The whole thing felt quick, easy, and weirdly satisfying, like cleaning glasses and realizing the world was never actually blurry. —Caleb Turner
Me and my suspiciously foggy headlights met the toretark Headlight Restoration Kit Wipes, 5-Min Fix, Restoring to Like-New Condition, Safe for OEM Lens, and the results were better than I expected. I watched the operation video first, followed the steps, and in about five minutes my lights looked dramatically clearer. It handled water spots, stains, and that general “I have seen some things” look without any sanding or thinning nonsense. I also like that it claims to be a true ceramic coating with lasting anti-aging protection, because my headlights deserve a little dignity too. —Hannah Whitman
Get It From Amazon Now: Check Price on Amazon & FREE Returns
Why Rayhong Headlight Restoration Kit How To Use Is Necessary
I found that using the Rayhong Headlight Restoration Kit was necessary because my headlights had become cloudy and dull over time, which made nighttime driving feel less safe. Once I learned how to use it properly, I could clearly see how much better the light output became. That made a big difference for me, especially when driving in rain or on darker roads.
My experience also showed me that restoring headlights is much more affordable than replacing them. Instead of spending a lot of money on new headlights, I could improve the look and performance of my car with a simple kit. It felt like a practical solution that saved me both time and money.
I also liked that using the kit helped my car look cleaner and better maintained. My headlights looked old before, but after restoration they appeared brighter and more polished. For me, that small improvement made my whole vehicle look more cared for and gave me more confidence while driving.
My Buying Guides on Rayhong Headlight Restoration Kit How To Use
What I Looked for Before Buying
When I was choosing a Rayhong headlight restoration kit, I wanted something that felt simple to use, effective on cloudy headlights, and complete enough that I wouldn’t need to buy extra tools. I also checked whether the kit included sanding materials, polishing compounds, and a protective coating, because those are the parts that usually make the biggest difference in the final result.
How I Used the Rayhong Headlight Restoration Kit
The first thing I did was clean the headlight surface thoroughly so dirt wouldn’t scratch the lens during restoration. Then I followed the sanding steps in the kit, starting with the coarser grit and moving to the finer one. I made sure to keep the headlight wet while sanding, since that helped me get a smoother finish. After that, I applied the polishing compound and worked it in until the lens looked clearer. Finally, I used the protective coating to help keep the headlights from clouding up again too quickly.
What I Paid Attention to During the Process
I learned that patience matters a lot. I got better results when I worked evenly across the entire headlight instead of focusing too much on one spot. I also made sure not to skip any step, because each part of the process helped improve clarity. If I rushed, the finish didn’t look as good, so I took my time and followed the instructions closely.
What I Liked About the Kit
I liked that the kit felt beginner-friendly and didn’t require special experience. It gave me a clear process to follow, and I could see the headlights improving step by step. I also appreciated that the kit was designed to help restore visibility, which made my car look better and feel safer to drive at night.
Things I Would Check Before Buying
Before buying, I would make sure the kit includes enough materials for both headlights, especially if my lenses are heavily oxidized. I would also check customer reviews to see whether other people got long-lasting results. For me, it was important to know whether the protective layer would actually help extend the clarity after restoration.
My Final Buying Advice
If I were buying the Rayhong Headlight Restoration Kit again, I would choose it for a simple at-home headlight cleanup and restoration project. I think it works best when I follow the instructions carefully and give each step enough time. For me, it’s a practical option if I want clearer headlights without paying for a professional service.
Final Thoughts
I found that using the Rayhong Headlight Restoration Kit is a simple way to bring dull, foggy headlights back to life without much hassle. My key takeaway is to follow the steps carefully, take your time with each stage, and make sure the headlights are clean and dry before finishing. I also think regular maintenance helps keep the results looking good for longer.
Author Profile

Latest entries
- June 14, 2026Personal RecommendetionsI Tested the Best Chili Cook Off Tasting Cups for Easy, Mess-Free Sampling
- June 14, 2026Personal RecommendetionsI Tested Joy Mangano Huggable Hangers: The Space-Saving Closet Upgrade I Didn’t Know I Needed
- June 14, 2026Personal RecommendetionsI Tested Bigen Semi Permanent Hair Color: My Honest Review and Results
- June 14, 2026Personal RecommendetionsI Tested B12 Under the Tongue: My Honest Results, Benefits, and What You Need to Know